Animal Pet Care Pro Documentation

Section One Click Demo Importer

The Demo Importer feature in WordPress makes it easy to import demo content in just a few simple steps.

Dashboard == Appearance == Get started

Click on"Run Importer".


Setting up Home page.

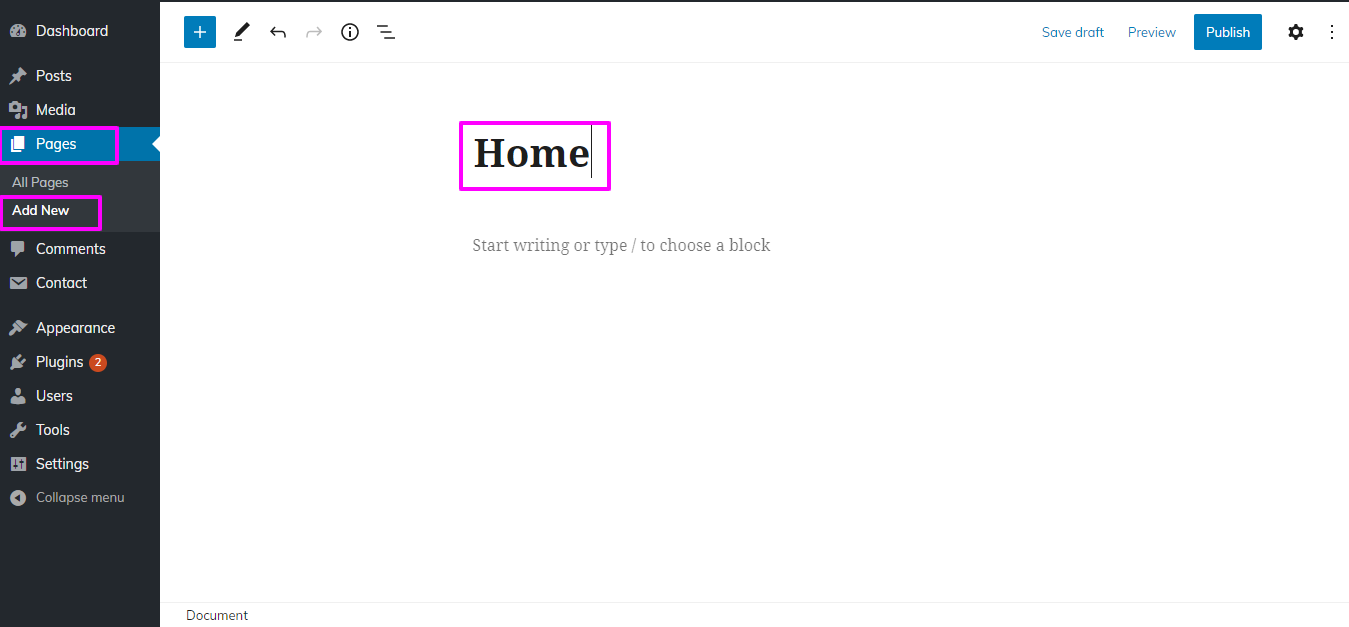
1) To Select The Template Same As Screenshot You Need To make a Page:Go To Your Dashboard Area == Scroll To Pages == Now Create A Add New .( Label The page as per your business requirement or you can use "Home")

Name your home page as Home Blog page or as required . Then select home-page from the dropdown .


2) Now for Final Set Up Navigate To Admin Dashboard Than Click on Setting Option == Move To Reading == Now Go To Home Page Display option select drop down under static to Home Page


As you follow the instructions about Website Setup, you will be able to achieve exact replica s our demo site.

Setting up Section Ordering Section

To rearrange or reorder the sections on your WordPress site,

Reorder the sections as per your need.

Navigate to Appearance == Theme Settings == Section Ordering


`

Setting up Top Bar Section

To start setting up the top bar on your WordPress site,

Navigate After that Cuatumize == Now theme Setting == Settings == Topbar


Topbar Section will appear like this.


Setting up Site Identity Section

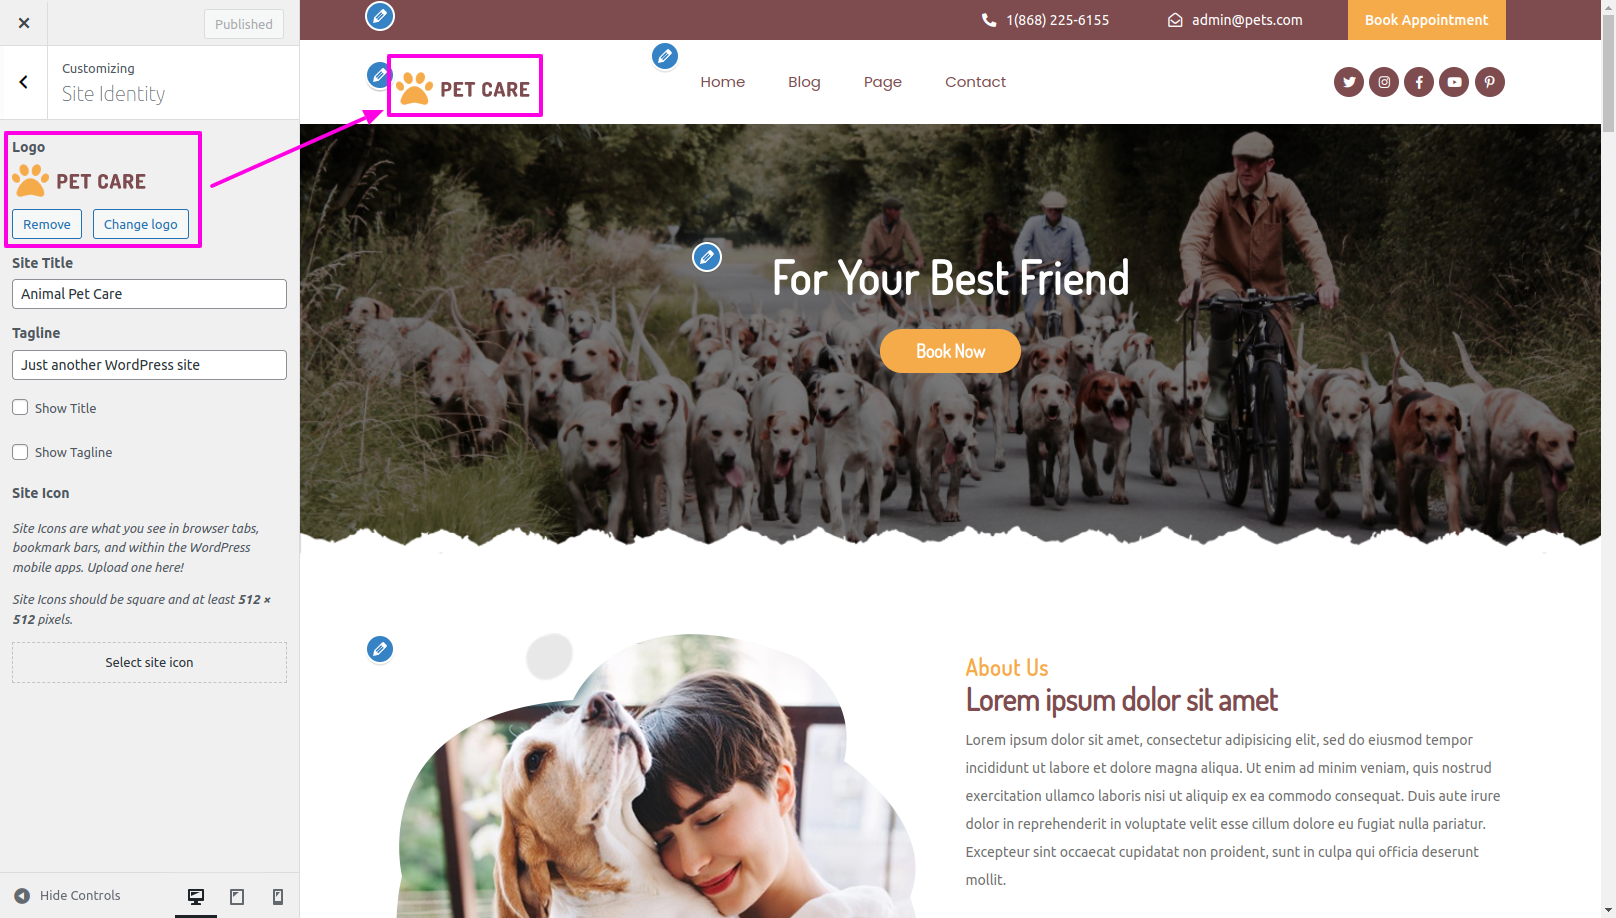
Now If you want to create site identity,

Appearance == Customize == Site Identity


Setting up Slider Section

You need to follow the below steps to set up slider section

Navigate After that Cuatumize == Now theme Setting == Slider Settings


To check out how it will look on front end you can check below

  • Enable/Disable option: Choose "enable" or "disable" to show or hide the section.
  • Number of Slider To Show: Select the desired number of sliders to display.
  • Slider Image: Set the images to be displayed on the sliders.
  • Slide text: Enter the text that you want to display on each slide.
  • Slider Button Text: Specify the text to be displayed on the slider buttons

To check out how it will look on front end you can check below


Setting up About Section

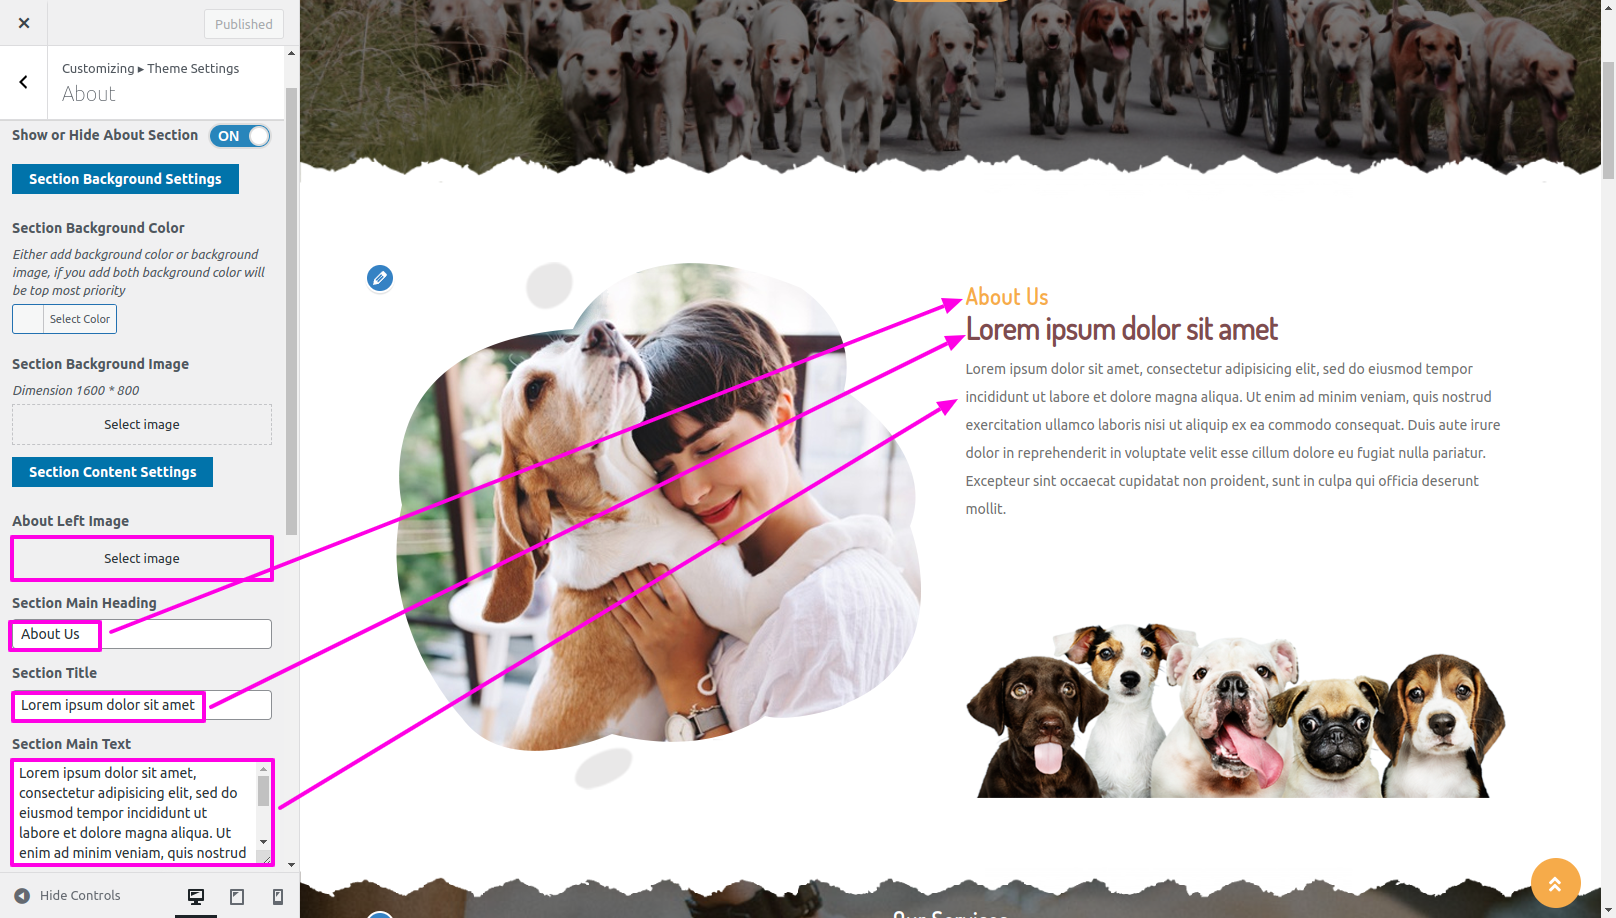
To start setting up the About us on your WordPress site

To start setting up the About us on your WordPress site

Navigate After that Cuatumize == Now theme Setting == About


To check out how it will look on front end you can check below


Setting up Service Section

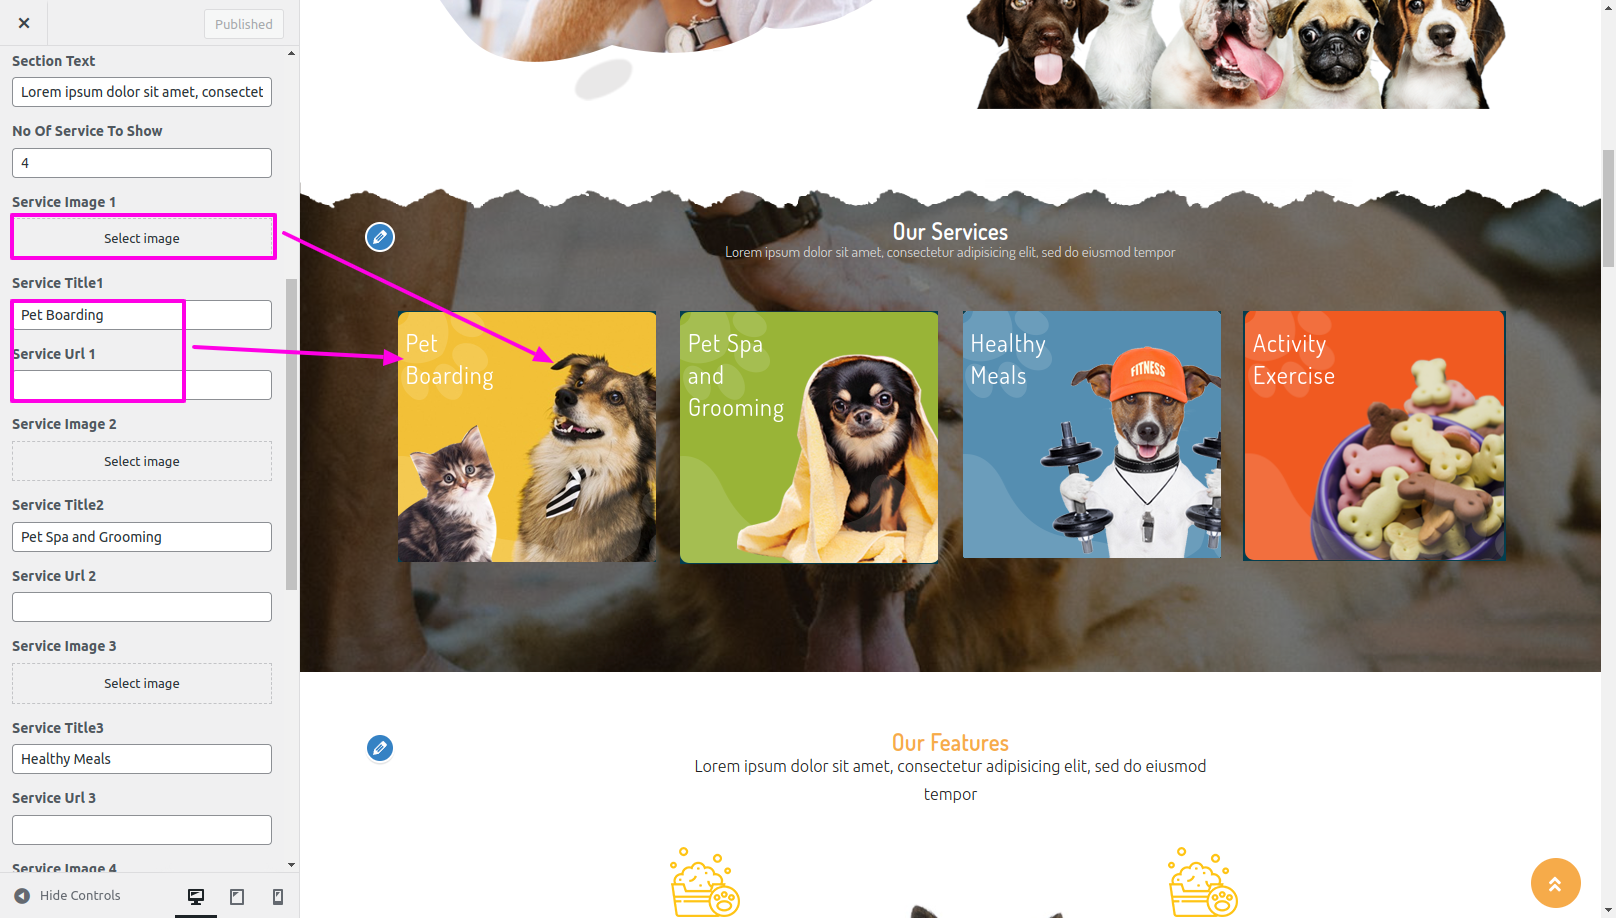
To start setting up the Service Section on your WordPress site,

Navigate After that Cuatumize == Now theme Setting == Services


The way it will be presented on the front end is like this.


Setting up Feature Section

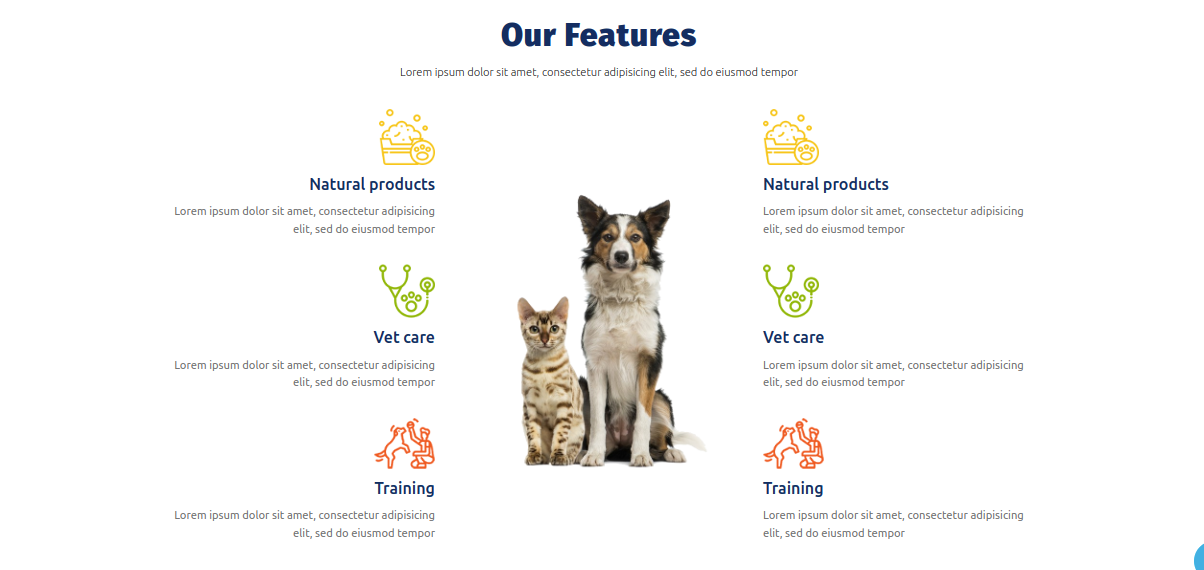
To start setting up the Feature on your WordPress site.

Navigate After that Cuatumize == Now theme Setting == Feature


The way it will be presented on the front end is like this.


Setting up What We Do Section

To start setting up the What We Do on your WordPress site.

Navigate After that Cuatumize == Now theme Setting == What We Do


The way it will be presented on the front end is like this.


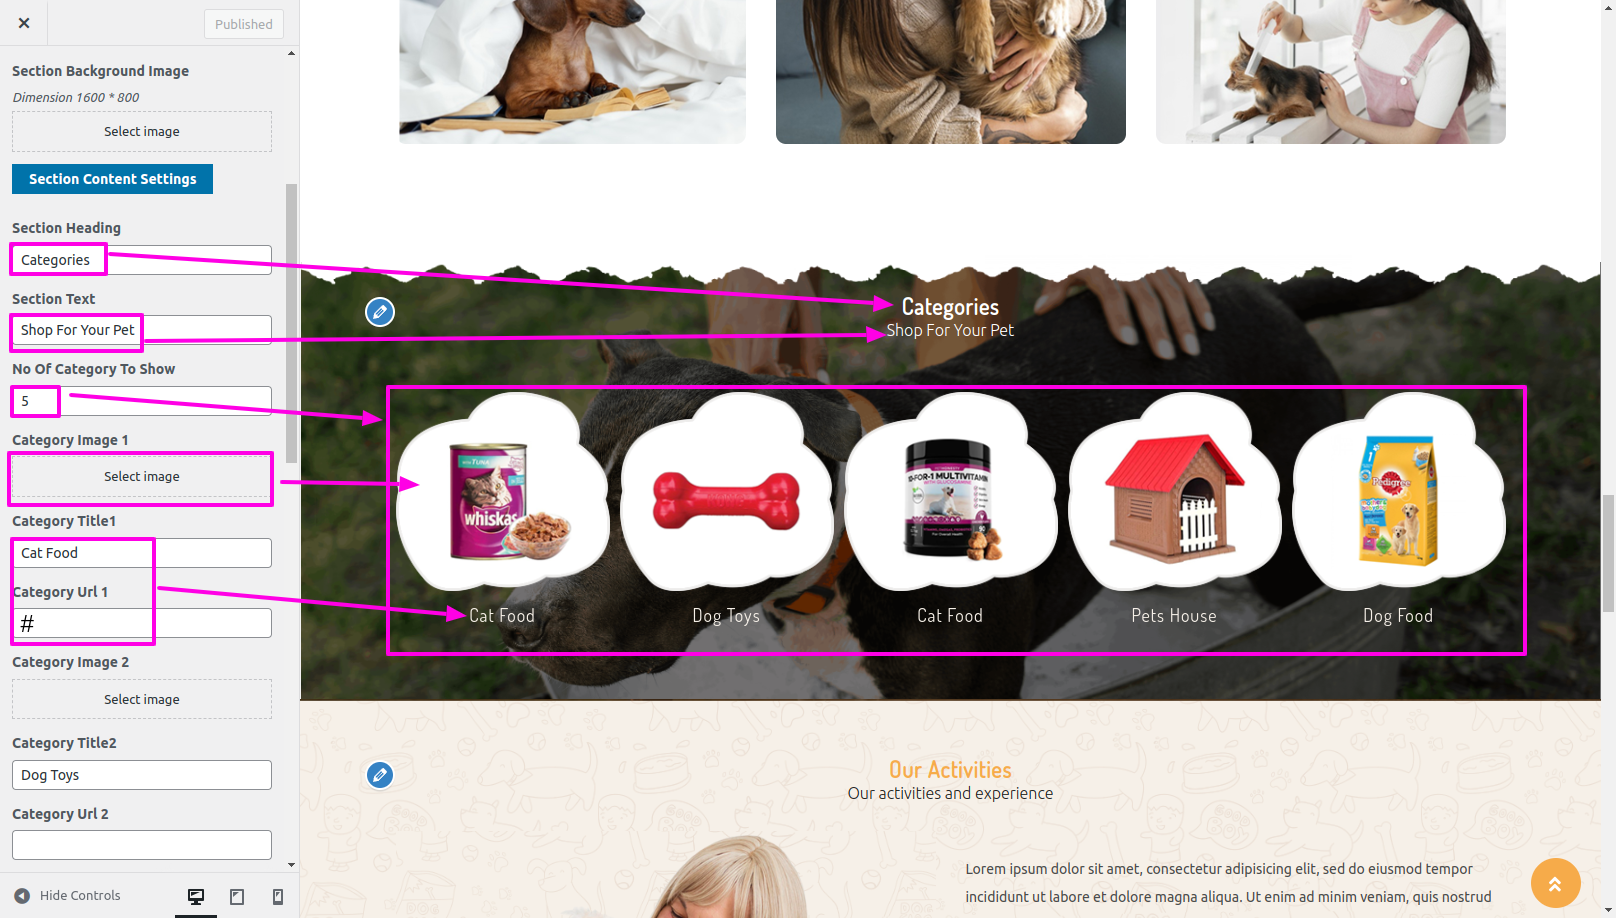
Setting up Category Section

To start setting up the Category on your WordPress site.

Navigate After that Cuatumize == Now theme Setting == Category


The way it will be presented on the front end is like this.


Setting up Activity Section

To start setting up the Activity on your WordPress site.

Navigate After that Cuatumize == Now theme Setting == Activity


To check out how it will look on front end you can check below

Setting up How It Work Section

Navigate After that Cuatumize == Now theme Setting == How It Work


To check out how it will look on front end you can check below

Setting up Testimonials Section

Navigate After that Cuatumize == Now theme Setting == Testimonial


To check out how it will look on front end you can check below

Setting up Latest News Section

To start setting up the Latest News on your WordPress site.

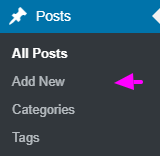
In order to Setting up the following Latest News section Navigate to Dashboard == post == Add New


Navigate After that Cuatumize == Now theme Setting == Latest News Section.

To check out how it will look on front end you can check below


Setting up Newsletter Section

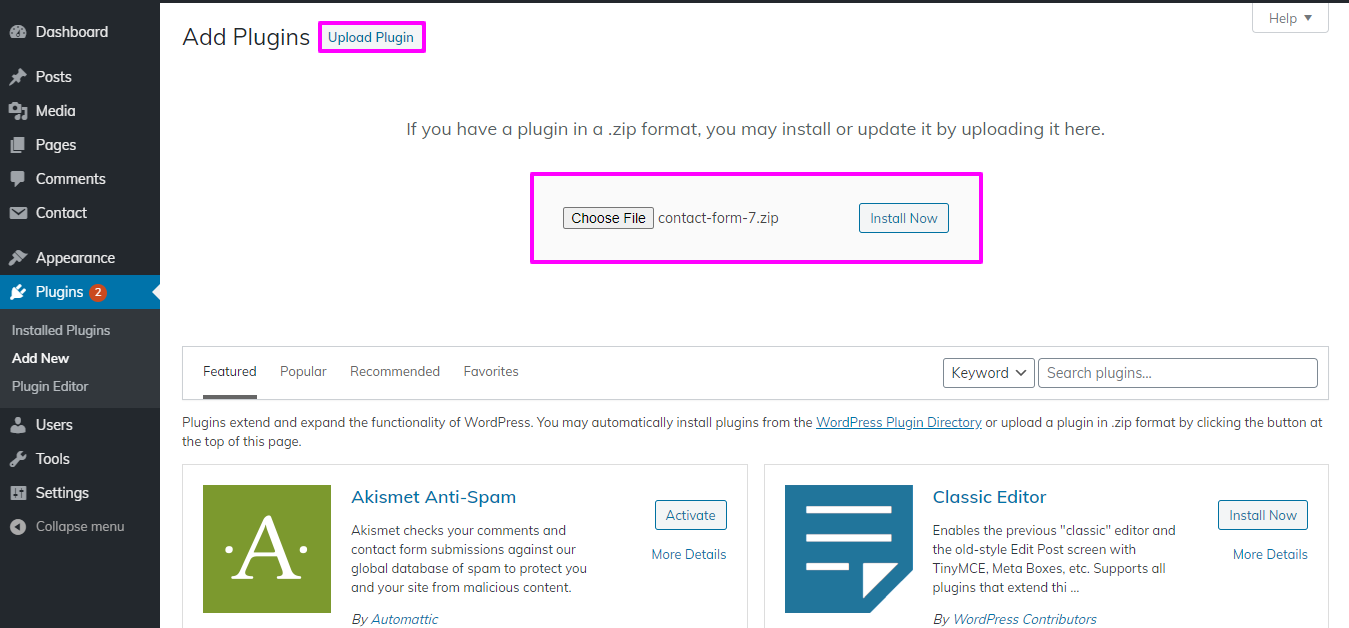
Before proceeding with the Newsletter section, we need to install contact forn 7 plugin. after the installation of contact forn 7 plugin. Contact options will appears on the Dashboard

Navigate to Dashboard == Contact == Add New


To start setting up the Newsletter on your WordPress site.

Navigate to Appearance == Customize== Theme Settings == Newsletter


To check out how it will look on front end you can check below

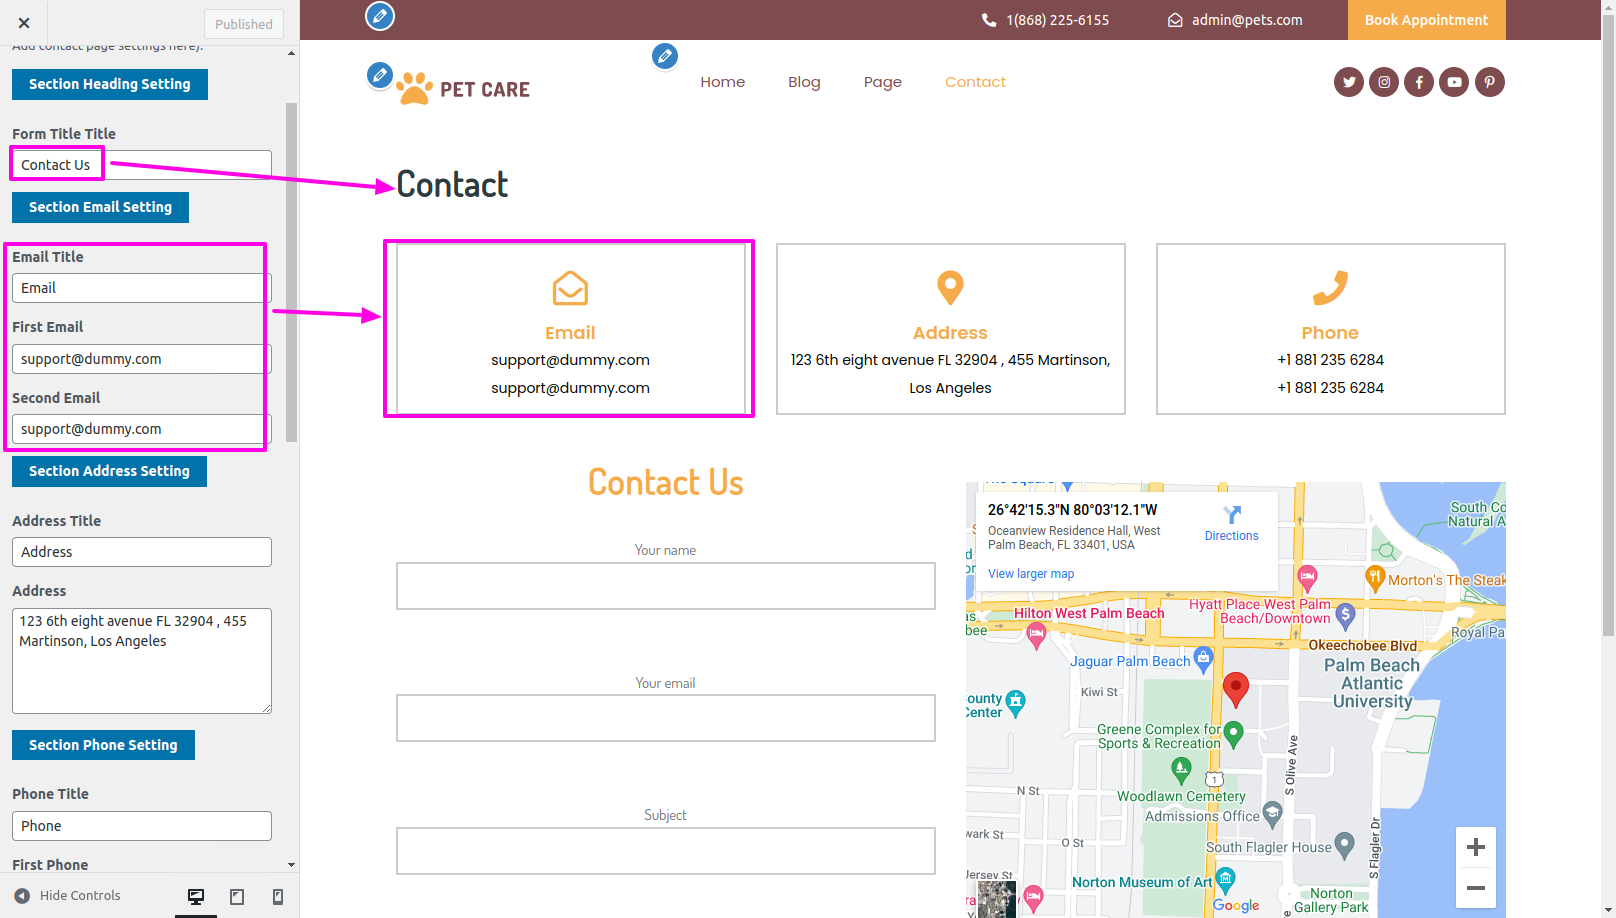
Setting up Contact Page

To set up the Contact Page section on your WordPress website, we need to install contact forn 7 plugin. contact options will appear once you install the plugin

Navigate to Dashboard == Contact == Add New


Navigate to Appearance == Theme setting == Contact


To check out how it will look on front end you can check below


Page Templates and sidebars

Page Templates

  • Default Template ⦇This is the default template page has right sidebar ⦈
  • Page with Left Sidebar ⦇ This is a template page with a left sidebar. ⦈
  • Page With Right Sidebar ⦇This is a template page has right sidebar. ⦈
  • Blog Full Width Extend ⦇ This is blog template has only one template and no sidebar. ⦈
  • Blog With Left Sidebar ⦇This is blog template has a left sidebar. ⦈
  • Blog With Right Sidebar ⦇ This is a blog template has right sidebar. ⦈
  • Contact Template ⦇This is the Contact Template - Doesn't Have Sidebar. ⦈
  • Home Page Template ⦇This is the default home page template has right sidebar.⦈

Post Format

Adding category

  1. sign in as administrator on your WordPress
  2. Click the Posts tab.
  3. Then, to select Categories for your post click on Categories.
  4. Now type the category name you need to categorise your blog into
  5. Now Add New Category By Clicking "Add New" Button.
  6. Finally, Publish

Creating a Blog post


  1. sign in as administrator on your WordPress
  2. Now Navigate your mouse to Posts tab.
  3. Now Add New post By Clicking "Add New" Button
  4. Add Desired Content in the editor.

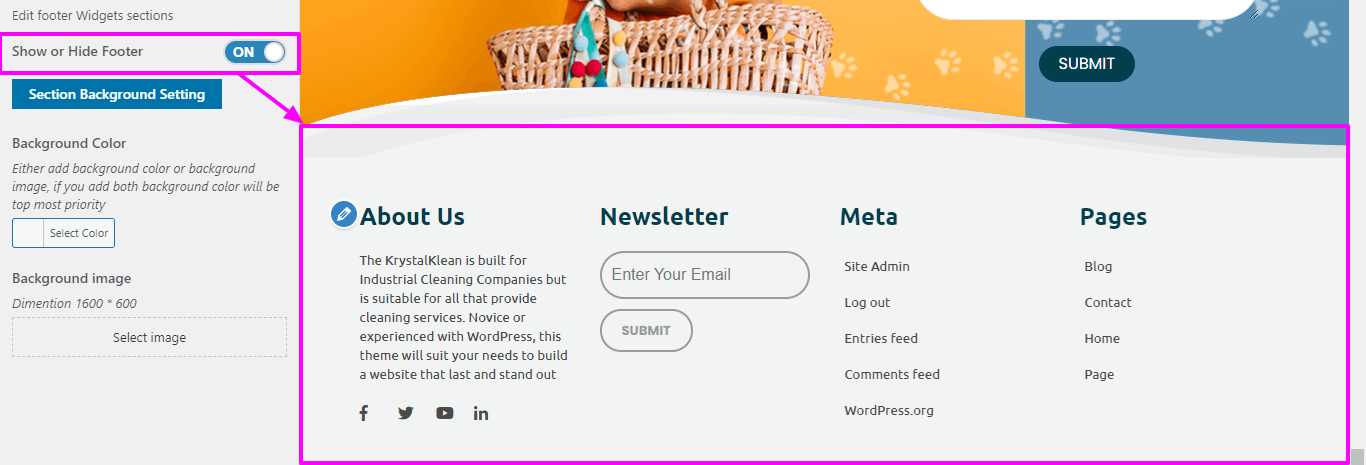
Widgets